There is now a FAQ and additional technical instructions. You can find these in Support + Questions.
Sometimes I have some challenging ideas, or crazy like some other people would say. This time I thought about our cat who is the whole day out, returning sometimes hungry sometimes not, sometimes with traces of fights, sometimes he stay also the night out.
Please consider that a collar on a neck of a cat is a potential safety risk. Because a cat wanders and crawls more or less in any place and can catch or trap itself with the collar on an object such as gate rods or tree branches. This may lead to dead of your pet. In the USA are collars common which provide a safety release if a certain amount of force is applied. Everything mounted to the collar will be lost in such a case. Please decide what is more important: The life of your pet or the device on the collar.
Best pick: VistaQuest VQ1005 Digital Keychain Camera 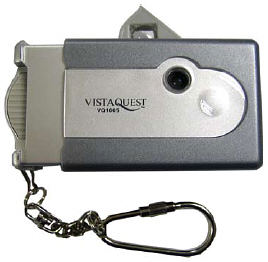
This camera is very attractive for unusual ideas because of its size, price and features. I checked some other small cameras but no one could compete against the VistaQuest. For only 20$ (16 Euros) you will get a small 38x60x20mm camera with 1.3M pixel resolution and a light weight of 35 Grams (without battery). The camera offers 8MB internal SRAM as well as a SD card slot were you can add up to 512MB flash memory. The camera is powered with only one AAA battery. You can strip the housing easily to loose weight or get even smaller dimensions. The focus can be adjusted manually. Camera is operated with just two buttons. A small USB interface connects the camera to a PC, no drivers required (at least with XP or 2000), camera is detected as generic USB mass storage device. You can also record movies (limited to 100s) or use it as a Webcam. A brief datasheet can be found on the VistaQuest website. Additionally the camera supplied two other internal features which made electronical controlling easy, these are listed in the next section. There are a few known issues:
For my project the VistaQuest Digital Keychain was the camera I looked for. My goal was to control the a camera by a microcontroller to shoot pictures in a defined time sequence. The VistaQuest made it very easy for me, because it is able to supply my circuit also if switched off. This is because of an internal DC/DC converter which boosts the voltage from the 1.5V battery to 3.3V. The DC/DC converter is always working because of the internal SRAM which holds the pictures. I just had to hook the microcontroller to the internal camera supply. 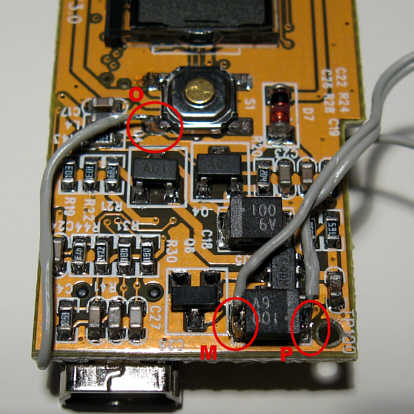
Signals to control the camera and supply external electronics can be found on the circuit: O=On/off (low active), M=Ground, P=3.3V supply. 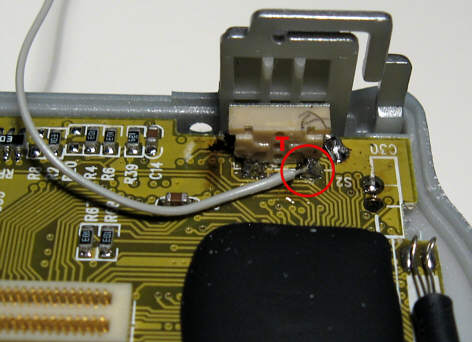
Trigger/Shutter signal can be found on the second circuit board at the switch terminal T (low active). 
The picture shows the circuit for the microcontroller board based on an Attiny2313. Later on I switched to an Attiny13 (only 8 pins). You can see that the interface is used for both programming and controlling. 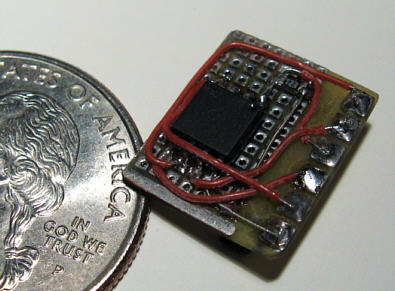
The picture shows the microcontroller board which plugs to the camera and controls it. 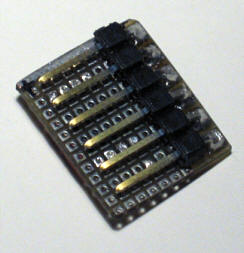
Located on the reverse side of the control board is the connector to plug onto the camera and also used to program the microcontroller. 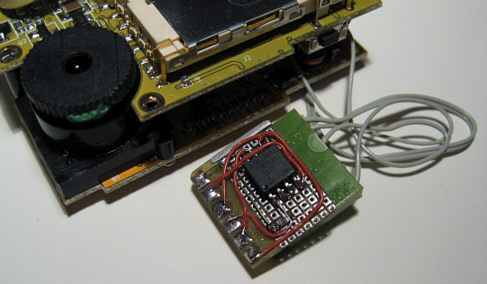
Here you can see the controller circuit plugged to the camera. The green connector fits to the programming interface of the uC board. Basic operation sequence:
Additional improvements: I realized soon that using a standard AAA battery limits the useful operation time very much. An operation time of 8 hours could be covered, taking one photo every 2.5 minutes. Also the reliability of the battery connection was weak. Therefore I decided to switch over to a 1.2V AA rechargeable NiMh battery with 2.5Ah. I removed the battery connection from the camera board and gained space for the larger AA cell. I soldered wires to the battery terminals (carefully ! Avoid to boil the electrolyte) and to the board. The result was amazing. One charge cycle provided more than 48 hours of operation with a trigger sequence of 1 Minute ! Fortunately the protective housing was large enough to carry the new battery. It turned out that the cat covered often the lens when lying around. So I simply put the camera top down in the housing. This required a new window hole but provided much better photos. Needless to say that the window has to be extra water tight. Another positive effect: The battery was now on the top, much easier access and much better balanced.
Well, I thought the hardest part is done by developing the software and soldering the controller board. But it is more the housing to protect the camera. You can not imagine what kind of requirements have to be fulfilled if you want to equip your cat with a camera. I built a small housing out of plastic plates and put it on the collar of the cat for evaluation purpose. This housing was last seen as the cat walked out of the door... Probably the wires I used for attaching were not strong enough. Or someone released the cat from the interesting looking piece.
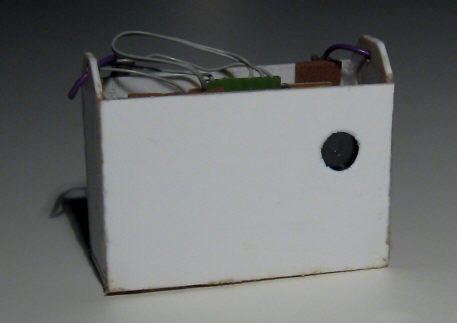
The final result for the protective housing. Upper side is closed with a piece of plastic which is attached by some tape. I made the housing out of a flat plastic lid which I cutted into pieces. The material was PP (Polypropylen) which is kind of soft but unfortunately not glueable with standard plastic or epoxyd glue. So I used hot glue which sticks good on PP. The whole housing is water thight, the lens is covered with a thin and clear PMMA plastic sheet. You can find a construction instructions here.
Big moment no. 1: attach the collar with the camera to the cat. The reaction was not very happy but finally accepted. Reality check passed :-) 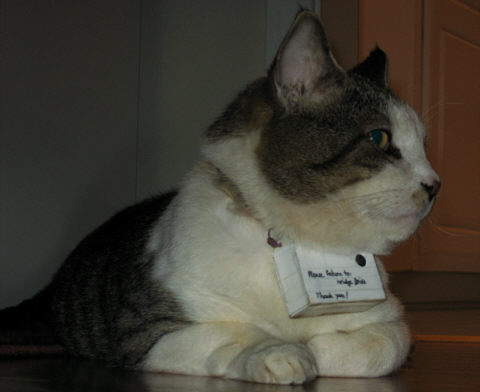
Well, here you can see Mr. Lee with his observation camera. Big moment no. 2: Cat returns with cargo. Could hardly wait until the collar was removed, housing opened, SD card plugged into computer to see how everything worked.
And here are the photos of his trips: Mr. Lees Trip 1 -> Mr. Lees Trip 2 -> Mr. Lees Trip 3 -> Mr. Lees Trip 4 -> Mr. Lees Trip 5 In the meantime some CatCam users provided own pictures: CatCam User Gallery |