 |
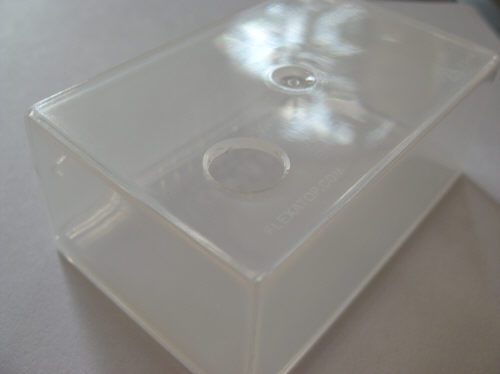
 Step 1 - Drill a 10-12mm (0.4 inch) hole for the lens. Best results if you use a wood drilling bit. The center of the hole is located 13mm (0.5 inch) from the side and 12mm (0.47 inch) from the bottom of the housing. Using this dimensions will ensure that the camera with original housing and the plain camera with stripped housing will fit. Hint: Pre-drill with a smaller diameter like 2mm (0.08 inch). This will result in a higher accuarcy for the large hole.
Attention: although the plastic material is solid, it will break during drilling if too much force is applied.
|
 Schritt 1 - Ein 10-12mm Loch für die Linse bohren. Die besten Ergebnisse erreicht man mit einem Holzbohrer. Die Mitte des Loches befindet sich 13mm vom Seitenrand und 12mm vom unteren Rand des Gehäuses. Bei Verwendung dieser Masse ist das Schutzgehäuse sowohl für die Kamera im Gehäuse als auch fuer die nackte Kamera ohne Gehäuse zu verwenden. Tipp: Mit einem kleineren Durchmesser (2mm) vorbohren. So wird eine höhere Genauigkeit für das grosse Loch erreicht.
Vorsicht: Auch wenn das Plastikmaterial ziemlich fest ist kann es beim Bohren brechen wenn zu viel Kraft aufgebracht wird.
|
 |
|
Step 2 - Drill the holes for the collar straps on the oustide of the top of the housing. A 2mm (0.08 inch) diameter should be sufficient but tight enough for the straps.
|
Schritt 2 - Die Löcher fuer die Halsbandaufhängung an den Außenseiten der Oberseite bohren. Ein Druchmesser von 2mm sollte ausreichend aber trotzdem noch eng genug sein für die Drähte.
|
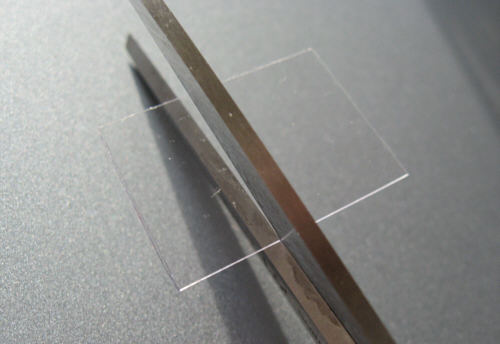 |
Step 3 - Now cut the lens window to a size of approx. 17x17mm (0.7x0.7 inch). Try to touch the window only on the outside edges.
This step does not apply if a glass window is used (as it is part of the newer kits). In that case take care not to hurt you on the sharp edges.
|
Schritt 3 - Jetzt das Sichtfenster zuschneiden. Eine Grösse von etwa 17x17mm sollte passen. Das Sichtfenster möglichst nur an den Kanten anfassen.
Dieser Schritt gilt nicht wenn ein Glasfenster verwendet wird (Bestandteil der neueren Kits). Dann ist darauf zu achten sich nicht die Finger mit dem Glas zu verletzen.
|
 |
|
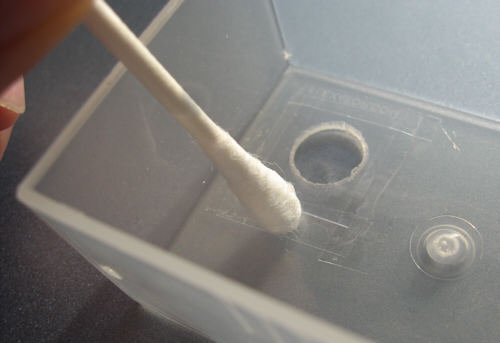
Step 4 - To fix the window to the housing, office tape like Scotch-Clear-Tape is used. The tape is usually too broad. Cut stripes in half, approx. 5-6mm (0.2 inch) broad.
|
Schritt 4 - Um das Sichtfenster am Gehäuse zu befestigen wird klares Tese-Klebeband verwendet. Das Band ist üblicherweise zu breit, deshalb wird es in ca. 5-6mm breite Streifen geschnitten.
|
 |
|
Step 5 - Place one tape stripe on a window edge so that it is half on the window and half off. Place the window in the housing over the lens hole. Use a Q-tip to fix the tape to the housing. The goal is that the window is fixes around all 4 sides. No tape should be in the area of the hole.
|
Schritt 5 - Platziere einen Klebebandstreifen auf einer Seite des Sichtfensters, so dass etwa die Hälfte davon überhängt. Dann das Sichtfenster im Gehäuse über der Linsenöffnung platzieren und mit einem Wattestäbchen das Klebeband andrücken. Das Ziel ist das Sichtfenster umlaufend mit Klebeband fest zu machen und zwar so, dass das Klebeband nicht in den Bereich des Loches kommt.
|
 |
|
Step 6 - Now solder the strap for the collar mounting together. The wire length is approx. 21-23cm (8.3-9 inch), dependig on how close the camera should be on the collar.
|
Schritt 6 - Jetzt den Riemen zur Befestigung am Halsband zusammenlöten. Die Drahtlänge ist ca. 21-23cm, abhängig davon wie eng die Kamera am Halsband sein soll.
|
 |
|
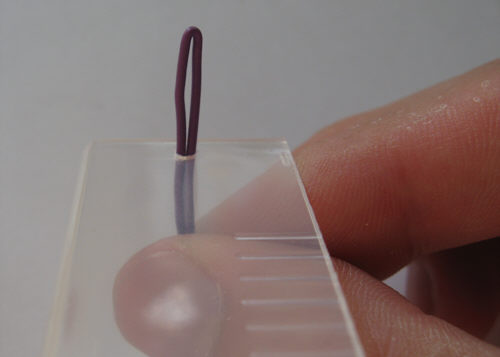
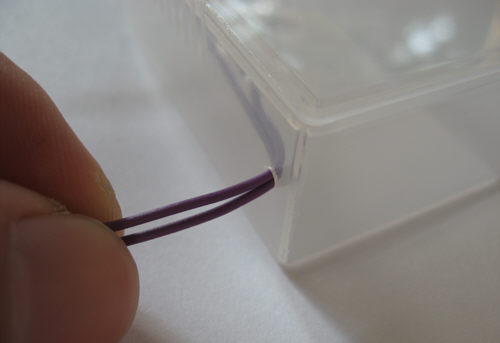
Step 7 - Press the ends of the wire ring together so that they fit through the holes in the housing.
|
Schritt 7 - Die Enden des Ringes stark zusammendrücken damit sie durch die Löcher im Gehäuse passen.
|
 |
|
Step 8 - Pull the strap though the holes.
|
Schritt 8 - Die Zipfel nach aussen durchziehen.
|
 |
|
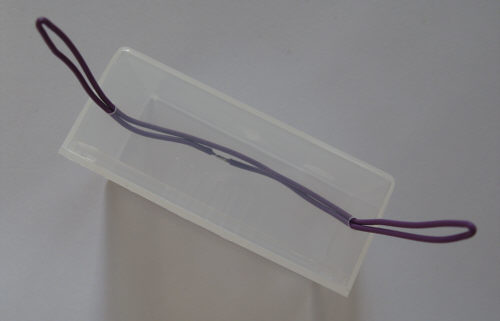
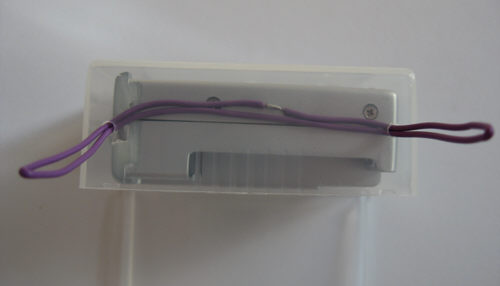
Step 9 - Both fixture straps should have the similar length. The housing is finished.
|
Schritt 9 - Die dadurch entstehenden Laschen dann in der Länge ausgleichen. Das Gehäuse wäre somit fertig.
|
 |
|
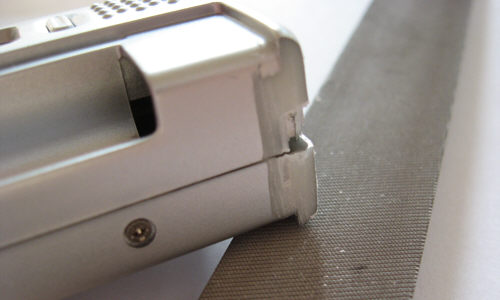
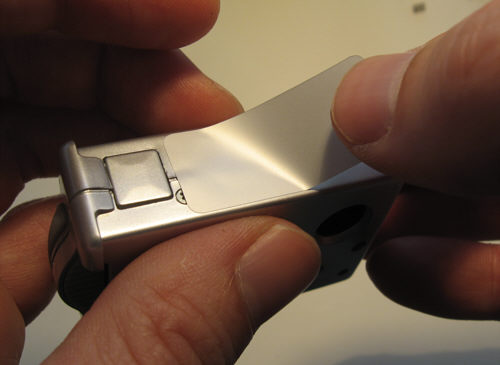
Step 10 - To make the camera fitting properly in the housing, an edge of the camera has to be removed. Using a fret saw for a raw cut and a finer file to smoth the cut works best. But the whole job can also be done with a rough file since it is just a small edge.
|
Schritt 10 - Damit die Kamera gut ins Gehäuse passt muss eine kleine Ecke entfernt werden. Am Besten mit einer Laubsäge grob absägen und dann nachfeilen. Oder mit einer gröberen Feile ganz abfeilen.
|
 |
|
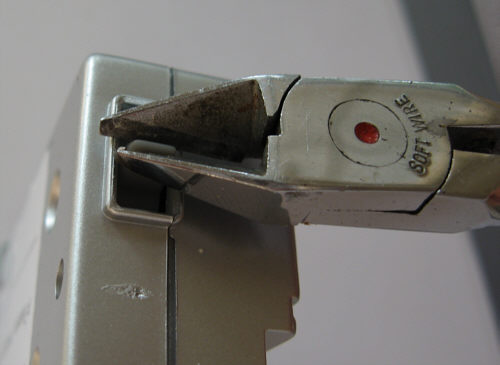
Step 11 - Then cut also the end of the lever of the manual focus.
|
Schritt 11 - Dann noch das Hebelende des manuellen Fokus abzwicken.
|
 |
|
Step 12 - A sticker closes the hole of the viewfinder.
|
Schritt 12 - Ein Aufkleber schliesst das Loch des Suchers.
|
 |
|
Step 13 - Job done ! Camera fits now in the housing and is perfectly protected.
|
Schritt 13 - Arbeit erledigt ! Die Kamera passt nun ins Gehäuse und ist perfekt geschützt.
|